In our previous blog post, Introducing AuroraTests: A Comprehensive Solution for HMI Testing, we covered the fundamentals of AuroraTests, a powerful framework designed for automate black box testing of Human-Machine Interfaces (HMIs). Building on that foundation, in this post we’ll share a practical example of using AuroraTests. We’ll guide you through a 5-step process, from setting up AuroraTests to creating a simple automated test that recognizes text on a screen and interacts with it.

Let’s start!

Setting Up AuroraTests

The first step is to set up the AuroraTests framework. AuroraTests is a Python-based framework, so you’ll need to have Python installed on your system.

Once Python is ready to go, all you need to do is install the framework, packaged as a Python Wheel (.whl) file, which simplifies the installation process. You can install it directly from your terminal or command prompt using the ‘pip’ package manager, which comes bundled with Python.

Next, open your terminal and run the following command:

				
					pip install aurora_tests-2.0.7-py3-none-any.whl


With AuroraTests now installed, you’re ready to start writing your first test. This setup process lays the groundwork for all the automated tests you’ll be creating, ensuring that the framework is in place and ready to handle the tasks ahead.

Setting Up Test Environment for SUT (System Under Test)

AuroraTests supports different levels of integration with different HMI SUT (software level, hardware level and combinations of both), for example integration with Android-based SUTs such as Polestar Emulator is supported out of the box.

For this example, we’ll use the Android Automotive Polestar2 emulator as our System Under Test (SUT). You can access the emulator here: https://www.polestar.com/global/developer/#emulator

Find a POI – The First Simple Test

Now that we’ve set up AuroraTests and the test environment, it’s time to create our first simple test.

In this test scenario, the goal is to find a Point of Interest (POI) on the map – specifically, a parking lot in the center of Malmö, Sweden.

Let’s break this down into a simple test case:

Test CaseGiven
(precondition)
When
(action/input)
Then
(result/output)
Find Aimo Park service parking in the center of Malmö.

1. The Android Automotive Polestar2 emulator is running.

2. The navigation app is opened.

1. Enter “Malmö” as the search address.

1. Aimo Park (POI) is shown on the map.

2. The POI information is displayed after tapping on it.

Writing the Test

With our test case clearly defined, we can now write the test using the AuroraTests framework.

The test does several things:

  • Screen Capture: The framework captures the current rendered image on the screen.
  • Text Recognition: It searches for the “Aimo Park” text on the screen.
  • Assertion: It verifies that the POI text was found.
  • Interaction: It simulates a tap on the found text to display more information about POI.

Below is the Python code that accomplishes this:

				
					from aurora_tests.pytest.fixtures import display, touches


def test_find_poi(display, touches):
    # Define the POI we are looking for
    POI = "Aimo Park"

    # Find the POI text on the screen
    poi_rectangle = display.grab().find_text(POI)

    # Assert that the POI was found
    assert poi_rectangle, "POI not found"

    # Tap on the found text to open a POI description
    touches.tap(poi_rectangle.center())

    # Simple assertion to ensure the test completes
    assert True


This snippet of code covers the entire process, from recognizing the POI text on the screen to interacting with it and verifying the outcome. It’s a great example of how AuroraTests simplifies the creation of automated tests, enabling us to focus on testing the functionality of the HMI without getting bogged down in complex scripting.

Automated Test Demonstration

And finally, we’ll walk you through the entire test execution process, step by step, so you can see exactly how the automated test is performed. We’ve included detailed screenshots at each stage, that will help you visualize what’s happening behind the scenes, from setting up the test conditions to running the code and finally seeing the results on the screen.

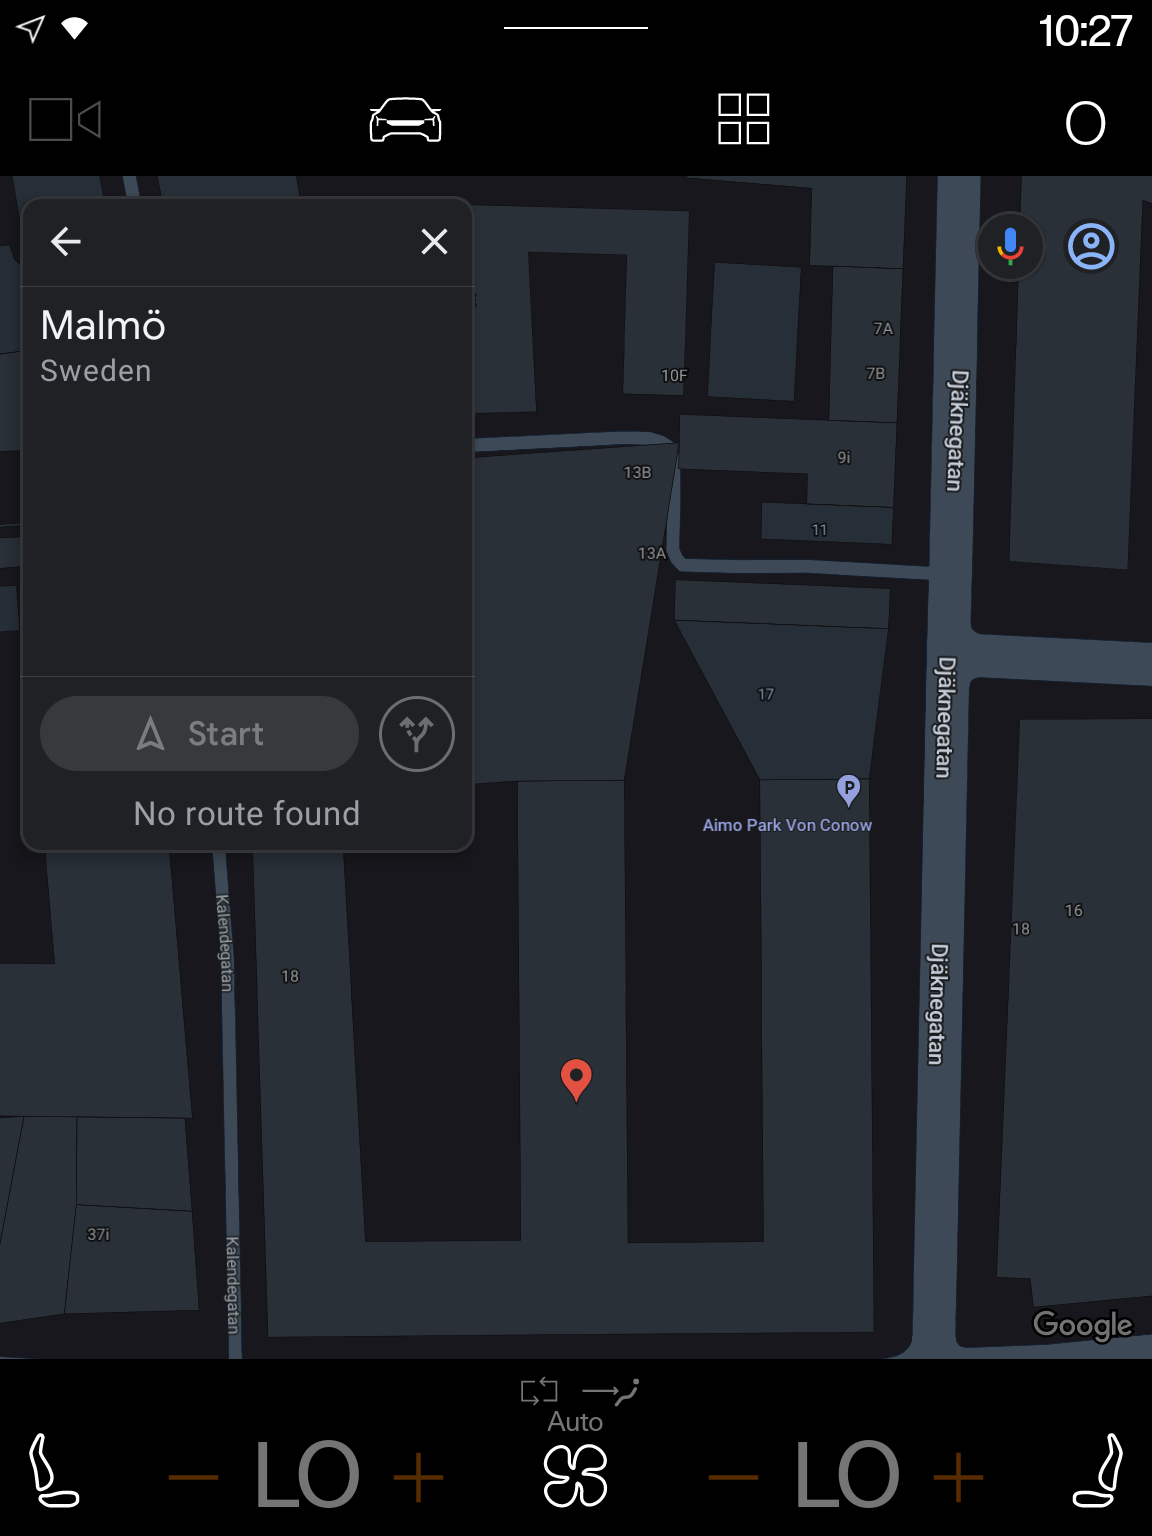
In this initial screenshot, the Human-Machine Interface (HMI) displays the navigation app with “Malmö” entered as the search address.

Screenshot 1: HMI Screen After Test Case Precondition

This screenshot shows the console in action, running the test and displaying output, indicating the progress and final passing result.

Screenshot 2: Console Running the Test
Screenshot 3: HMI Screen After Test Execution

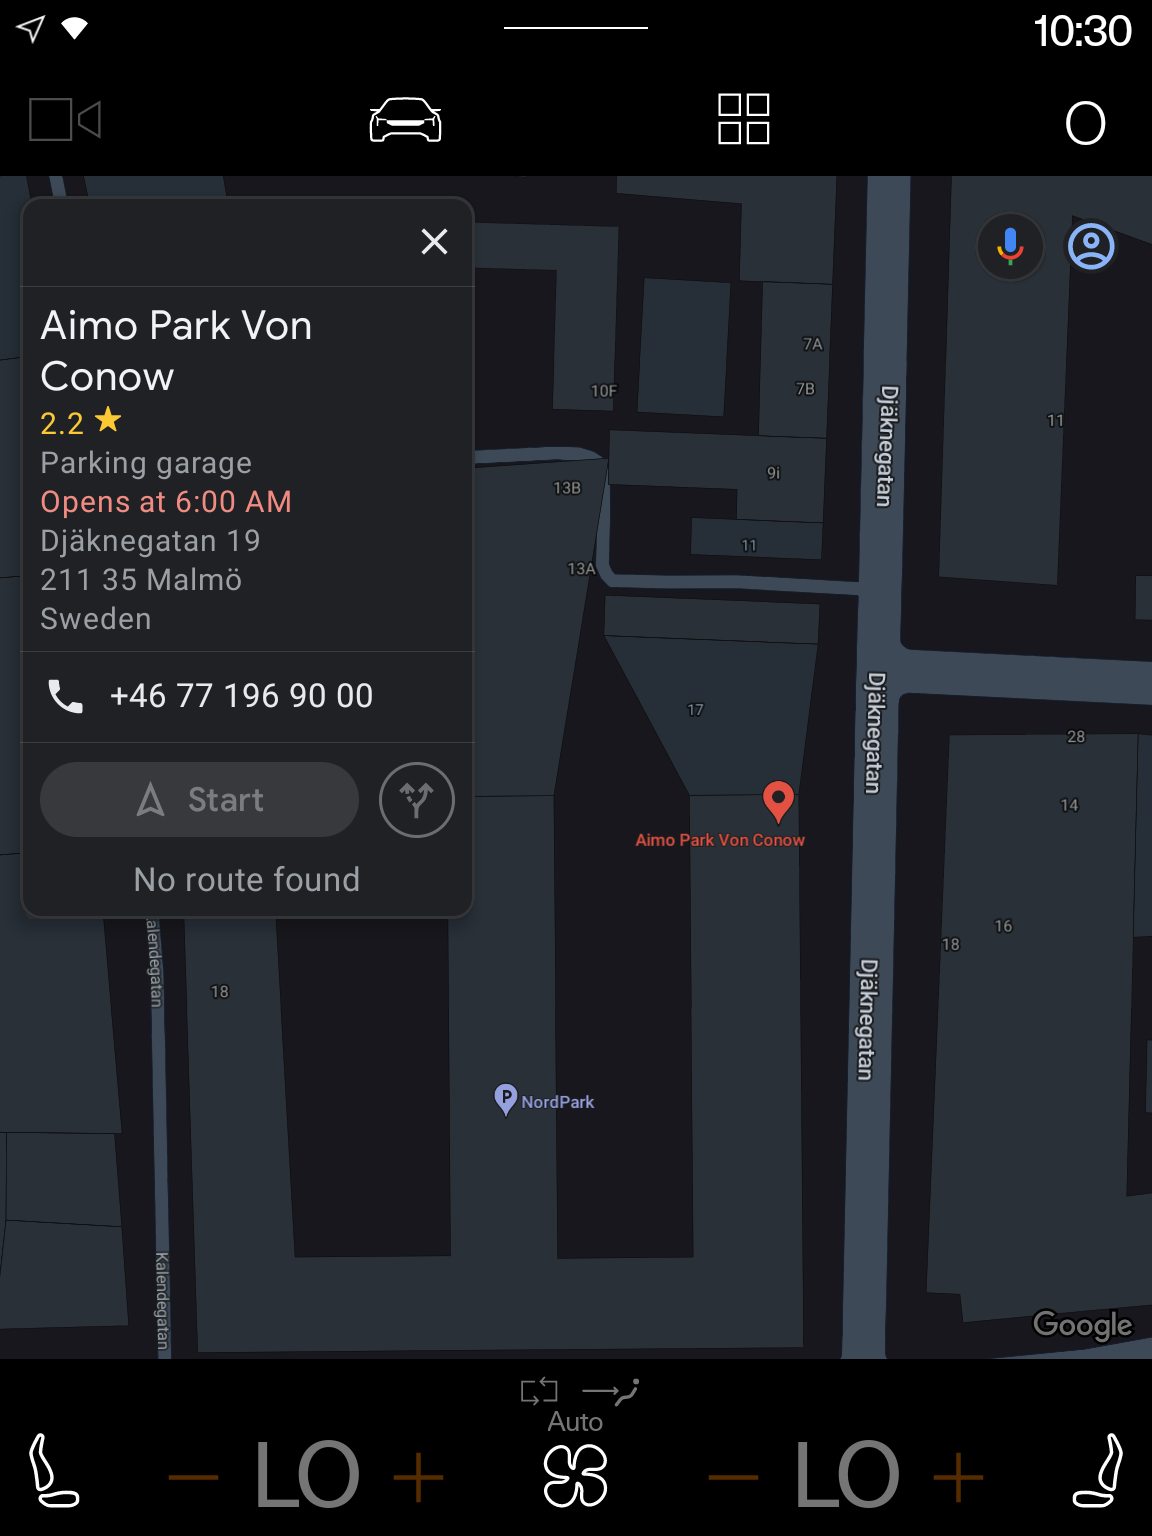
The final screenshot displays the HMI after the test has run, showing that the POI (Aimo Park) has been successfully located and selected.

Summary

As demonstrated, setting up and using AuroraTests is both simple and efficient. With just a few lines of code, you can create automated test that interact with the HMI, showcasing the framework’s capabilities in text recognition and touch simulation (one of the key features of AuroraTests).

By following these steps, you can easily adapt the framework to test other scenarios and elements within your application, paving the way for more extensive testing automation.

In the upcoming posts, we’ll include the preconditions in the test script, such as running the navigation app and entering “Malmö” in the search area, to create a more comprehensive test scenario. Stay tuned!

Contact Us

Experience the future of HMI testing with AuroraTests, and take your testing process to the next level. For more information, schedule a demo or reach out to us at info@datajob.se.